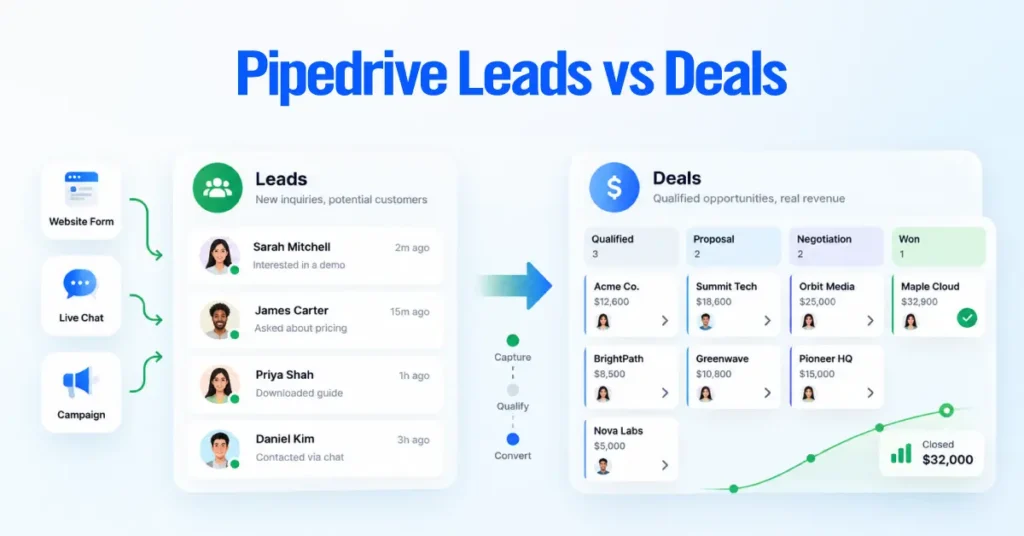
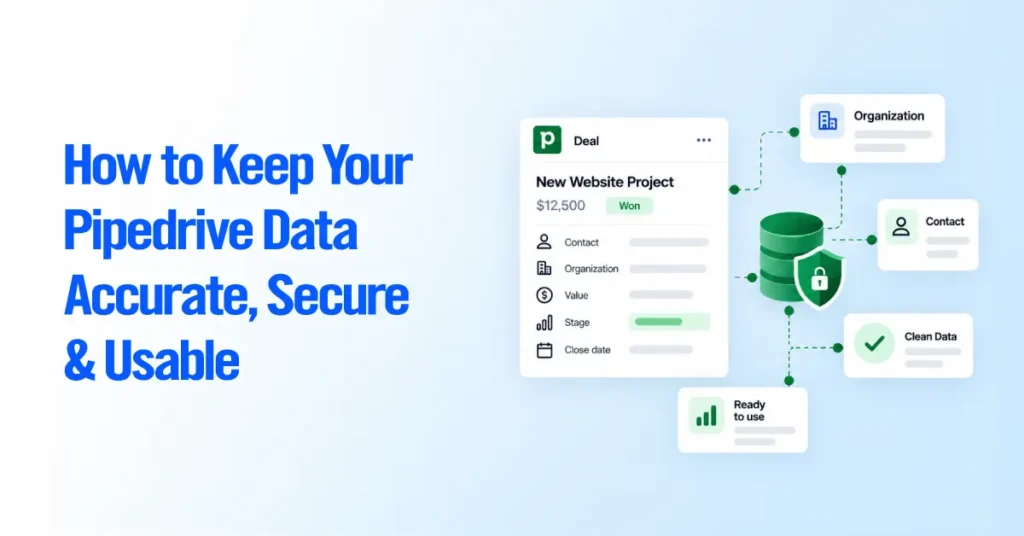
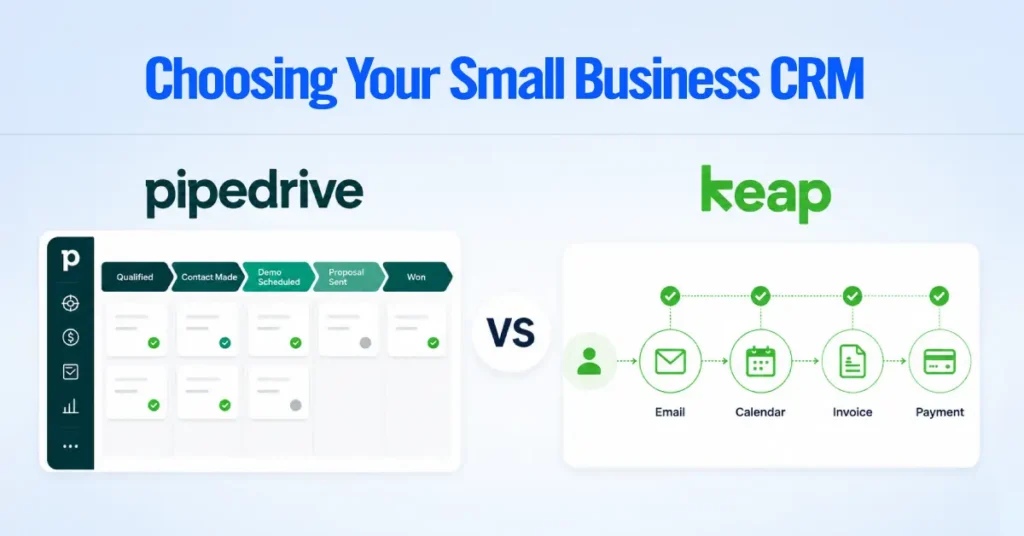
AI Summary




TL;DR
- Plan before you build. Map your real sales stages and write exit criteria for each stage before touching settings.
- Pipedrive has four plans in 2026, no permanent free plan, and a 14-day trial. Several setup features are plan-gated, so confirm your tier first.
- Email sync needs Growth or higher. Automations need Growth or higher. Lead routing, custom visibility groups, and deal revenue forecasting need Premium or higher.
- Import order matters. Clean your CSV, then import organizations, people, and deals so records link correctly, and keep the 48-hour revert window in mind.
- Automate the boring parts first. Follow-up activities on stage change, lead assignment, and manager alerts remove the most admin without hiding work from reps.
- A full small-business implementation with migration, automation, and integrations usually takes several days to a few weeks, depending on data quality and team size.
Most Pipedrive rollouts do not fail because the software is hard. They fail because teams create an account, drag in a few deals, and skip the decisions that make a CRM usable six months later. The result is a messy pipeline, half-synced email, automations nobody trusts, and reps who quietly go back to their spreadsheets.
We set up and clean up Pipedrive for B2B sales teams for a living, and this guide walks you through the same sequence we use on client implementations. You will move from planning and account configuration through pipeline design, data migration, automation, integrations, reporting, and team adoption, with the exact menu paths and where each feature lives.
Here is the short version of the process. You plan your sales stages, configure the account and users, build one pipeline that mirrors how you actually sell, import clean data, connect email and calendar, add a few high-value automations, connect your sales and marketing tools, then set up Insights reporting before you hand it to the team. Do it in that order, and the CRM works with your process instead of against it.
Plan Your Pipedrive Setup and Sales Process Step-by-Step
Plan your pipeline before you open a single settings menu. The most common reason a Pipedrive setup underperforms is copying a pipeline from a template instead of building it around how the company actually sells. Spend an hour mapping your process, and the rest of the configuration becomes obvious.
Two planning tasks do most of the work. First, audit your current sales cycle so the pipeline reflects reality. Second, define what has to be true for a deal to leave each stage. Everything downstream, from automation to forecasting accuracy, depends on these two decisions.
Audit Your Current B2B Sales Cycle
Start by writing down the steps a real deal goes through from first contact to closed, in the order they happen. This map will guide your pipeline stages. Do not design the ideal process yet. Document the one you use today.
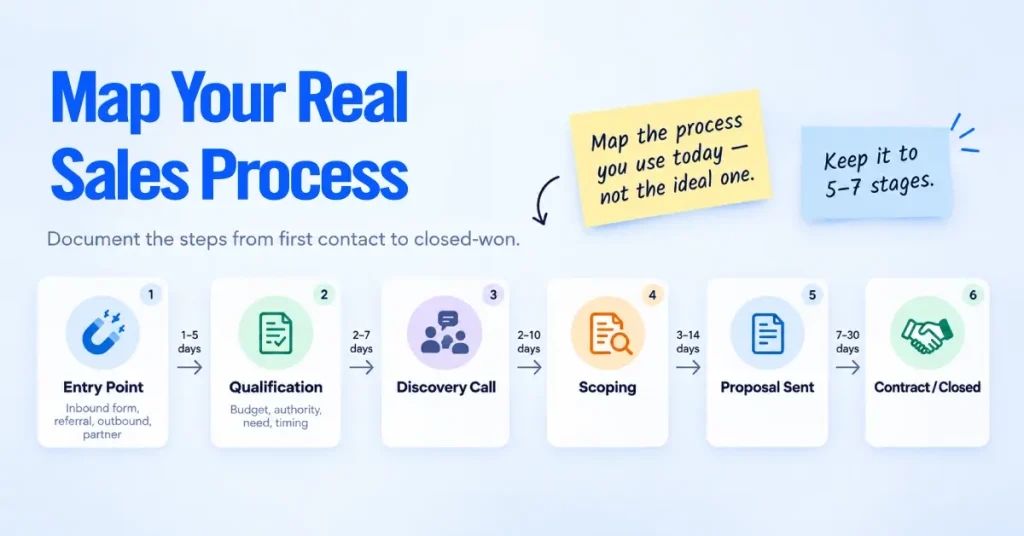
Work through these prompts with the people who actually sell.
- Entry point: How does a prospect first enter your process? Inbound form, referral, outbound list, or partner.
- Qualification: What must you confirm before you invest real time? Budget, authority, need, and timing are the usual four.
- Commitment moments: Where do prospects visibly move forward? A booked discovery call, a scoping session, a proposal, a contract.
- Handoffs: Who owns the deal at each step, and where does ownership change?
- Typical length: Roughly how many days pass between each step? You will use this later to set deal rotting periods.
Keep the stage count tight. Five to seven stages is enough for most B2B teams. Extra stages feel thorough, but they slow reporting and give reps more places to park deals without action.
A pipeline stage should represent a change in the buyer’s commitment, not a task your rep still has to do. “Proposal Sent” is a stage. “Send Proposal” is an activity. Mixing the two is the single most common structural mistake we fix.
Define Clear Deal Stage Exit Criteria
Exit criteria are the conditions a deal must meet to move to the next stage. Write one clear rule per stage so every rep moves deals for the same reason. Without this, two reps will report the same deal as being in two different stages, and your forecast becomes fiction.
A practical set of exit criteria for a common B2B pipeline looks like this.
| Stage | A deal can leave when |
| Lead In / New | Contact details are complete and the lead matches your target profile |
| Contacted | A two-way conversation has happened and interest is confirmed |
| Qualified | Budget, decision-maker, need, and timeline are all documented |
| Proposal Sent | The prospect has received a written proposal or quote |
| Negotiation | The prospect is engaged on terms, price, or scope |
| Won / Lost | A signed agreement (Won) or a documented lost reason (Lost) |
Store these criteria somewhere the team can see them, and turn the important ones into required fields later in the setup. When you enforce exit criteria with fields rather than memory, your pipeline data stays clean.
Set Up Your Pipedrive CRM Account
Pipedrive is a cloud-based CRM, so there is very little to install. You need a modern web browser and an internet connection, and optionally the iOS or Android app for mobile access. No software to host and no server requirements, so you can have a basic account live within an hour.
Before you start, confirm three things about your subscription, because they change what you can configure.
- Plan. Pipedrive offers four plans in 2026: Lite, Growth, Premium, and Ultimate. Pricing runs from about $14 to $79 per user per month on annual billing, or $24 to $99 on monthly billing, based on Pipedrive’s official US pricing. There is no permanent free plan, but every plan includes a 14-day free trial with no credit card required. Always confirm current pricing on Pipedrive’s own pricing page before you commit.
- Seats. Decide how many users you are onboarding now. Pipedrive is billed per user per month, and annual billing lowers the rate.
- Add-ons. Lead generation (LeadBooster), extra document tooling, and campaign email are add-ons on lower tiers. Note which ones you actually need so your first bill holds no surprises.
Once you set your plan, work through the four steps below in order
Step 1: Initial Registration and Company Settings
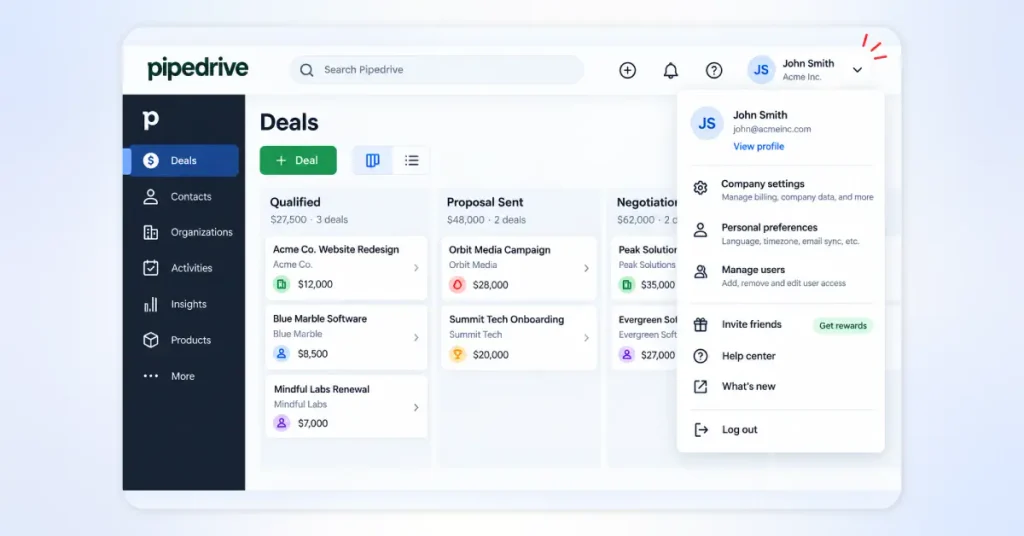
Create your account, then set your company defaults first so every record that follows inherits the right values. Open the account menu in the top-right corner and go to Company settings.
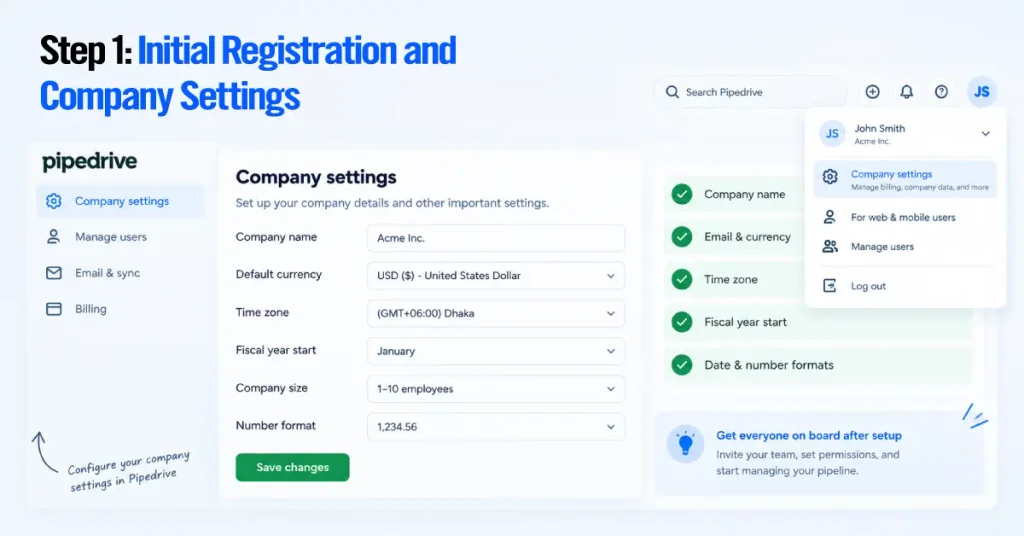
Set the following.
- Company name as it should appear to your team.
- Default currency, and add any secondary currencies you sell in.
- Time zone, so activity times and reports line up with your working day.
- Fiscal year start, because it drives how revenue reports and forecasts are grouped.
- Company defaults for date format and number format.
Getting the fiscal year and currency right now saves a painful cleanup later, since both feed directly into your reporting.
Step 2: Configure Users, Roles, and Visibility Groups
Add your users, then control what each person can do and see using two separate systems. Permission sets control what a user can do. Visibility groups control what records a user can see. You configure these independently, which trips up a lot of first-time admins.
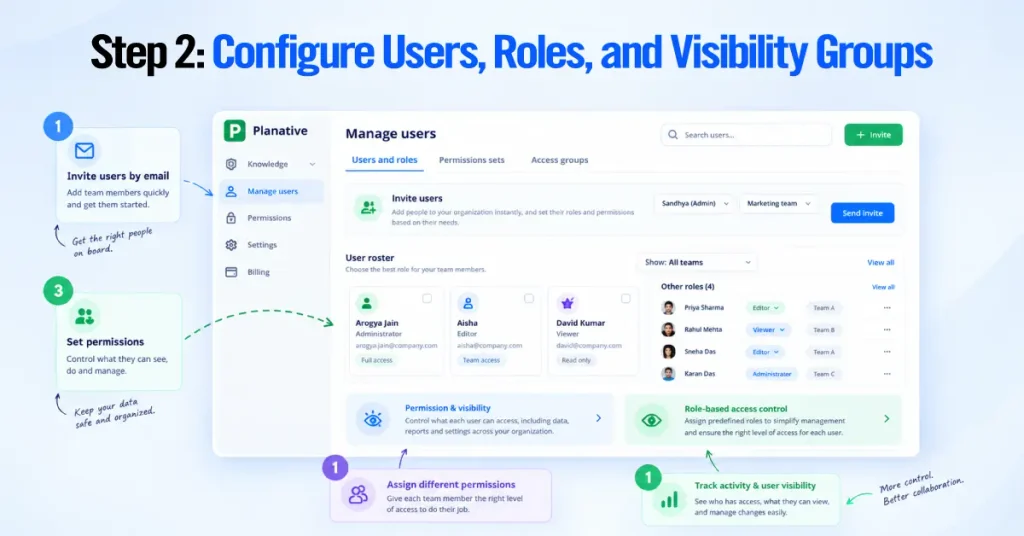
Add users first. Go to Settings, then Manage Users, and invite people by email. Pipedrive invites users one at a time by email, so there is no bulk CSV user upload. Every user is one of three types.
- Regular User works within the permissions and visibility you assign.
- Admin bypasses most visibility restrictions, so assign this role sparingly.
- Global Admin (the account owner) controls billing and account-wide settings.
Next, set permissions. Go to Manage Users, then Permission sets, and either use the default sets or click “+ Permission set” to build a custom one. Granular custom permission sets are available on Premium and Ultimate. On Lite and Growth, you work with the default sets.
Then set visibility. Go to Settings, then Manage Users, then Visibility groups. On Lite and Growth, you have a single default group, so each item is visible either to its owner only or to everyone. On Premium, Ultimate, and Enterprise, you can create multiple visibility groups and sub-groups, and you can hide specific pipelines from specific groups.
Best practice we apply on every build. Start with tighter visibility than you think you need. It is far easier to open access later than to explain to a rep why they could see the whole company’s pipeline for a month. Set owner-only visibility by default, then widen it deliberately.
Step 3: Set Up Custom Fields
Add custom fields so Pipedrive captures the data your process depends on, and nothing more. Go to the account menu, then Personal preferences, then Data fields. You will see field sets for leads, deals, organizations, people, products, and projects. The number of custom fields you can create depends on your plan.
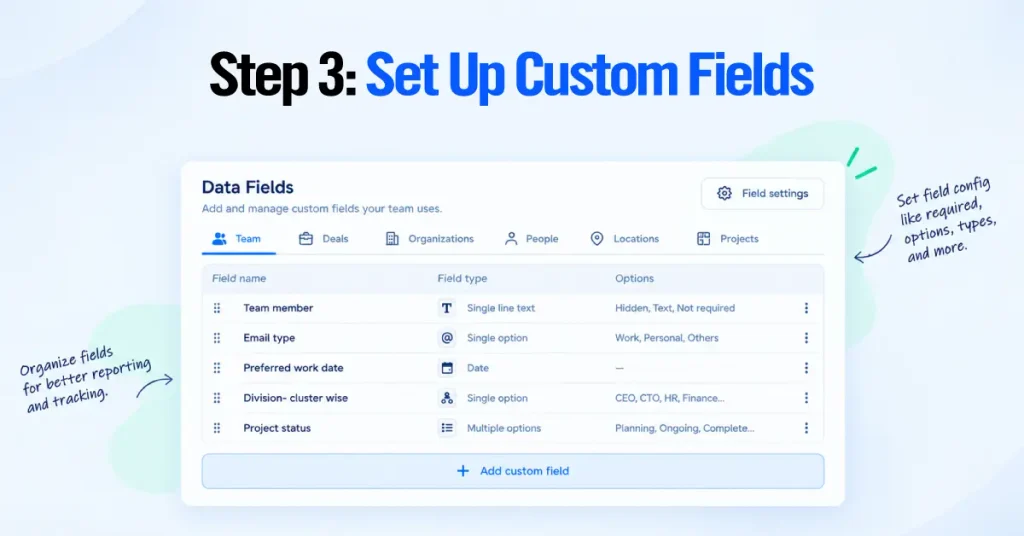
Capture only the fields you will use in a filter, a report, or an automation. Every extra field is one more thing a rep has to fill in and one more place data goes stale. A lean, high-value field list for most B2B teams includes:
- Lead source on the deal or lead, so you can report on what actually converts.
- Deal type or product line, if you run more than one offering.
- Expected close date, which powers forecasting.
- Decision-maker role on the person record.
- Lost reason, which you can set as a required field when a deal is marked lost.
Choose field types deliberately. Single-option or multiple-option fields keep reporting clean because they force consistent values, while free-text fields are almost impossible to report on. Tie your fields back to the exit criteria you wrote earlier, and make the deciding ones required so the pipeline enforces your process.
Step 4: Add Products, Pricing, and Product Variants
Add your products if you sell defined items or service packages, so quoting and revenue reporting run on real numbers instead of guesses. Enable the Products feature from Company settings, then add each product with its price, currency, and, where relevant, its cost and tax.
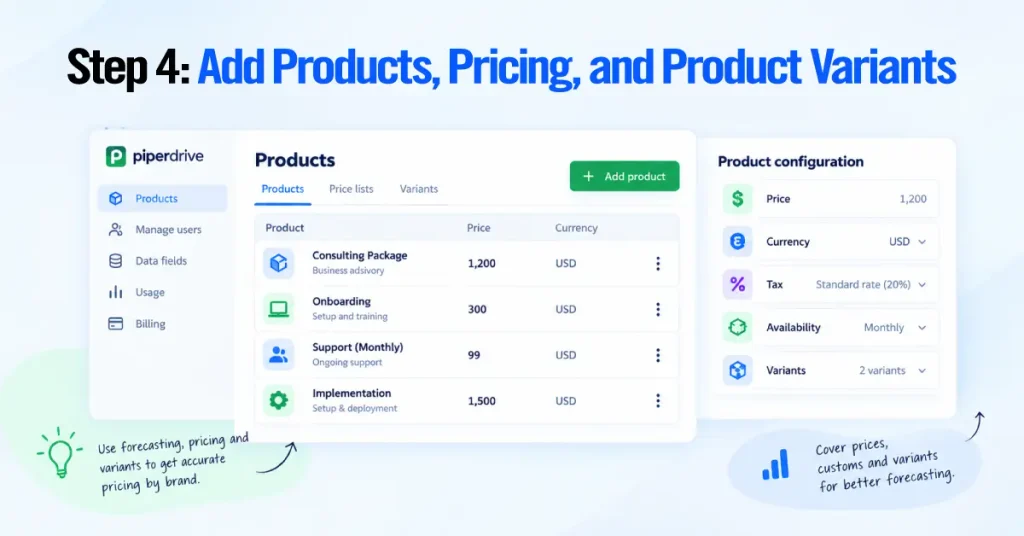
Products give you four practical wins. Faster, more consistent quoting; cleaner forecasting; revenue reporting by product line; and the data behind Pipedrive’s product revenue forecast report.
For recurring or subscription offerings, set the billing frequency and billing start date on the product. This recurring data feeds the product revenue forecast report, which is available on Growth and higher plans. If you sell the same core product in tiers or configurations, use product variants, so reps pick the right version at quote time instead of editing prices by hand.
Set Up Your First Pipedrive Sales Pipeline
Build one pipeline that mirrors the sales cycle you mapped earlier, using the stages and exit criteria you already defined. This is the core of your CRM. Reps live in the pipeline view every day, so a clear pipeline is the difference between a CRM that gets used and one that gets abandoned.
Pipedrive gives you a default pipeline with sample stages. Replace it with your own instead of working around it.
How to Create and Customize Pipeline Stages
Edit your pipeline stages directly from the pipeline view. Open the Deals section, make sure your pipeline is selected, and click the pencil (edit) icon on the pipeline.
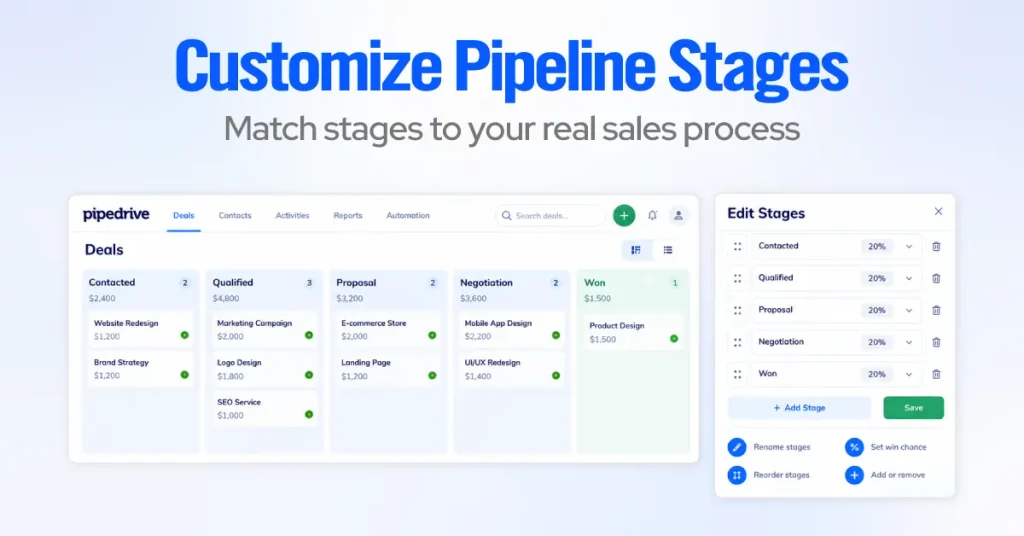
From there, you can:
- Rename each stage to match the stages from your process map.
- Add or remove stages until the pipeline reflects your five to seven real steps.
- Reorder stages by dragging them into the correct sequence.
- Set a stage probability on each stage, which is the rough likelihood a deal at that stage will close. This feeds weighted pipeline value in reports.
- Save changes in the upper-right corner.
Keep the win and loss actions clean. Mark a deal Won only when the agreement is signed, and mark it Lost with a documented reason. Resist adding a “dead” or “on hold” stage, since parked deals inflate your pipeline and distort every report that follows.
Give deals a consistent, scannable title so the pipeline stays readable as it fills up. A pattern we often use is Organization – Product/Service – Value; for example, Northwind Ltd – Onboarding Retainer – $12k. When you import deals, Pipedrive can auto-generate titles from the linked person or organization name, so setting a naming rule before import saves a cleanup pass.
Set Up Deal Rotting and Follow-Up Rules
Turn on deal rotting so stale deals become visible instead of silently dying. Rotting flags a deal in red on the pipeline when it has had no activity for a number of days you define per stage.
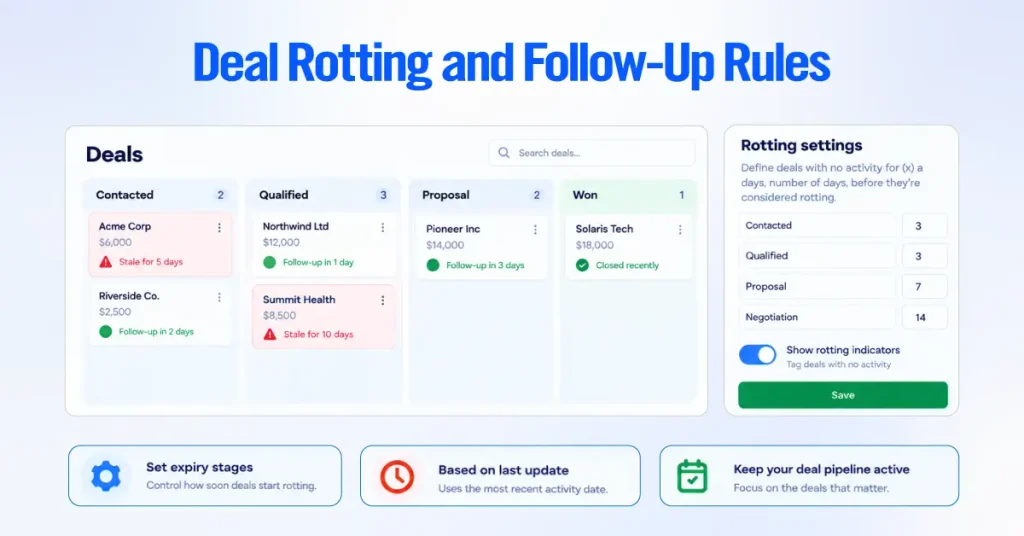
To set it up, open the pipeline view, click the pencil (edit) icon, toggle on “Rotting in (days)” for a stage, and enter the number of inactive days that should trigger the flag. You can set a different rotting period for each stage, which matters because a deal can sit longer in Negotiation than in Contacted before it counts as neglected. Save your changes.
A few things worth knowing about how rotting behaves.
- The timer is based on the deal’s last-updated time, including marking activities done and sending, receiving, or editing linked emails.
- Rotting ignores a future scheduled activity, so a deal with a follow-up booked far out can still rot. Pair rotting with realistic next-step activities.
- Editing any detail on the deal restores it to a healthy state.
For follow-up discipline, adopt the rule that no open deal should ever have zero scheduled next activities. You can enforce this later with an automation that creates a follow-up activity whenever a deal moves stage, which we cover in the automation section.
Manage Multiple Pipelines for Different Sales Processes
Create separate pipelines only when a process is genuinely different, not just for a different team. Pipedrive supports multiple pipelines; add a new one from the pipeline view using the pipeline dropdown. A second pipeline is justified when the stages themselves differ.
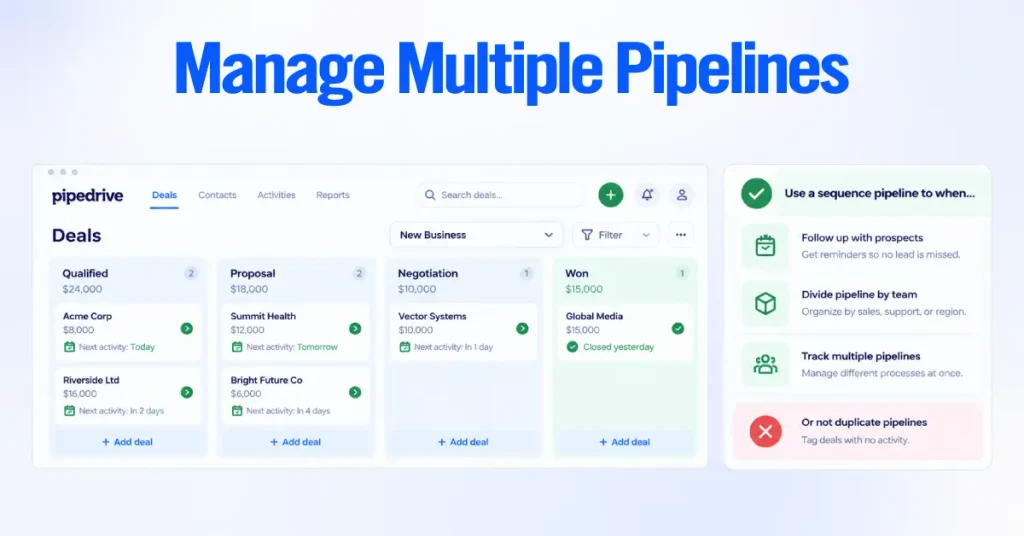
Good reasons for a second pipeline include:
- New business versus renewals or upsells, which follow different steps.
- Distinct product lines that buyers move through differently.
- A post-sale onboarding or delivery process you want to track separately from selling.
Avoid creating a pipeline per rep or per region when the stages are identical. Those differences belong in filters, owners, and visibility groups, not in duplicate pipelines. Too many near-identical pipelines fragment your reporting and make it hard to see the whole business at once.
Pipeline best practices:
- Keep stages to five to seven.
- Name stages after buyer commitment, not rep tasks.
- Set stage probabilities honestly. Turn on rotting per stage.
- Use one pipeline until a truly different process forces a second.
- Enforce one exit rule per stage with required fields (only available on Premium and Ultimate).
Import and Sync Your CRM Data
Import your data in the right order and connect email and calendar so the CRM starts with clean, linked records instead of empty screens. Migration is where many implementations go wrong, usually because a messy spreadsheet gets pushed in and creates duplicates that take weeks to untangle.
Pipedrive imports from XLS, XLSX, and CSV files and can create or update people, organizations, leads, deals, projects, activities, notes, and products.
Clean and Format Your CSV Data Before Importing
Clean your file before you import anything. The quality of your import is decided in the spreadsheet, not in Pipedrive. Preparing the file correctly is what prevents duplicates and skipped rows.
Work through this checklist first.
- Decide what you are importing. Contacts only, contacts with deals, or new deals for existing contacts. This decides how you structure the file.
- Map to Pipedrive’s structure. Import companies as organizations and people as persons. Keep one record per row.
- Split names correctly and standardize date, phone number, and currency formats so rows aren’t skipped for invalid formats.
- Remove obvious duplicates before import, and decide which record is the source of truth.
- Create any missing custom fields first, or create them during the mapping step, so every column has a place to land. Job title, for example, is not a default field, so add a custom person field for it.
Download Pipedrive’s sample import spreadsheet from the import screen and match your columns to its layout. The sample marks mandatory fields, which saves guesswork during mapping.
Import Contacts, Organizations, and Deals
Import your records from the import tool, and let Pipedrive link them together. Go to the account menu, then Tools and apps, then Import data, and click “Get started” (also reachable as “From a spreadsheet”).
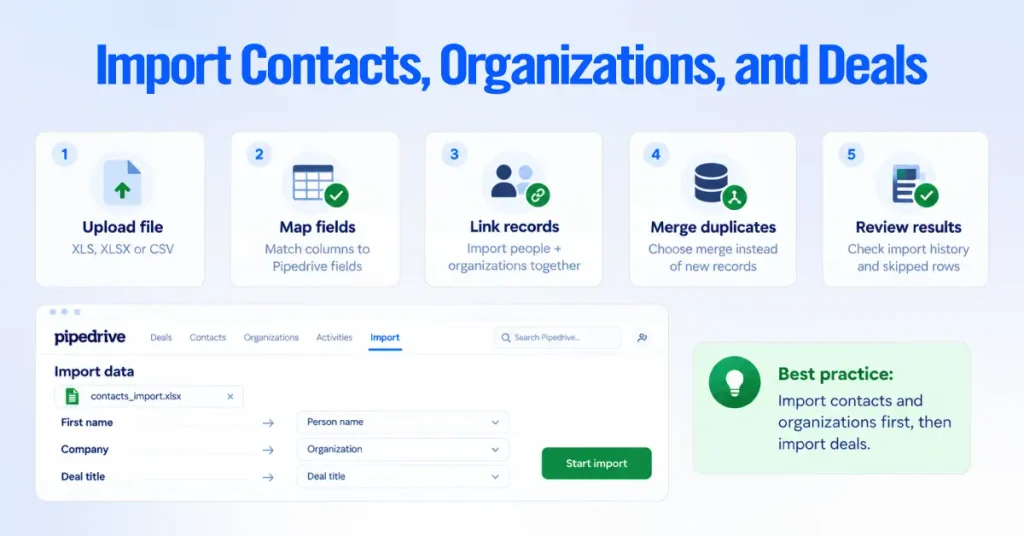
The flow runs like this.
- Upload your XLS, XLSX, or CSV file.
- Map columns to Pipedrive fields on the mapping screen. Fields are grouped by item type, and you can create a new custom field here without restarting.
- Import people and organizations together in one file so Pipedrive links each person to the right organization automatically.
- When prompted, handle duplicates by choosing to merge rather than create new records.
- Start import, then review the summary in the import history tab, which shows how many records were added, updated, merged, or skipped. Skipped rows appear in a skip file with the reason for each.
Two safeguards are worth remembering. A global admin can revert an import from the import history tab within 48 hours if something goes wrong.
And for future bulk updates, export the records with their Pipedrive System ID, edit in a spreadsheet, and re-import against that ID to update in place instead of creating duplicates.
Import contacts and organizations first, confirm they linked correctly, then import deals. Importing deals against existing contacts keeps ownership and associations intact and avoids orphaned records.
Sync Business Email and Calendar
Connect email and calendar so every message and meeting logs automatically against the right deal. This removes most manual data entry and gives managers real visibility into deal communication.
Email sync is available on Growth and higher plans. Set it up from your email settings inside Pipedrive, choosing a personal account (visible only to you unless shared) or a team account for a shared address such as [email protected].
Team inbox is available on Premium and higher plans. Email sync works with major providers including Google Workspace and Gmail, Microsoft 365 and Outlook, and Microsoft Exchange. Once connected, incoming email automatically links to the matching contact and, when that contact has a single open deal, to that deal.

If a contact has multiple open deals, you link the thread manually. Email aliases aren’t supported, so connect the primary address.
Set up calendar sync from the account menu: Personal preferences > Calendar sync > “Connect account.” Choose one-way or two-way sync, and select which Pipedrive activity types should appear on your external calendar.
Pipedrive calendar sync supports Google, Outlook, Office 365, and Exchange. IMAP and POP are not supported for calendar sync, and only future events sync, so anything scheduled before you turned on sync will not appear. If you use Exchange with two-factor authentication, you will need to create an app password.
Set Up Pipedrive Automation
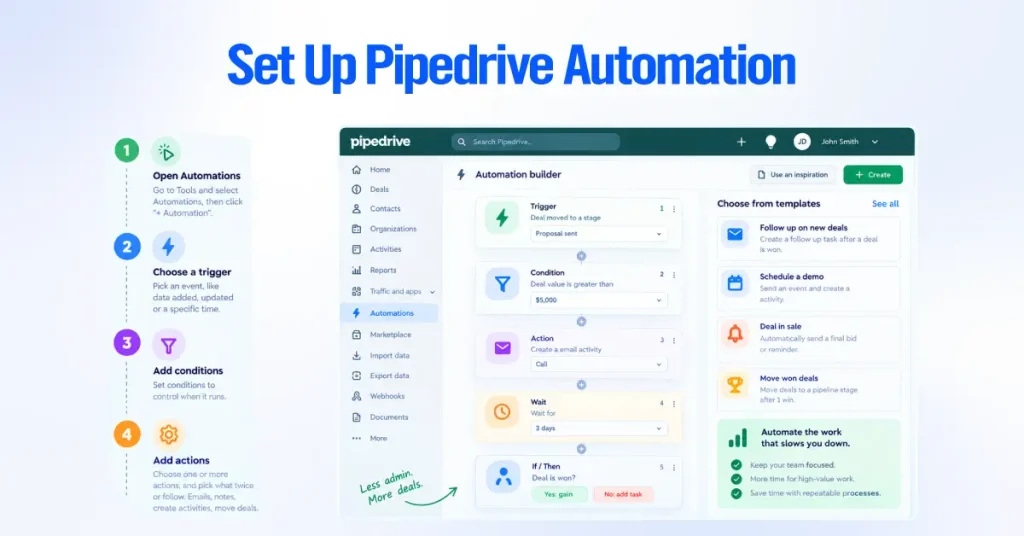
Build a small set of automations that remove admin without hiding work from your reps. Pipedrive’s workflow automation runs on a trigger, optional conditions, and one or more actions. Automations are available on Growth and higher plans, and Pipedrive ships pre-made templates to get you started.
To open the tool, go to the account menu, then Tools and apps, then Automations, and click “+ Automation.” Pick a trigger event (or a date-based trigger), add conditions to filter when it should run, then add action steps. For more complex flows, you can add wait steps and if/else branches to split the path.
Set Up Lead Routing and Deal Assignment
Automatically route new work to the right rep so nothing sits unassigned. There are two ways to do this depending on your setup.
- Rule-based assignment at capture. If you use the LeadBooster Chatbot or Web Forms, you can assign a captured lead to a specific rep as part of the capture setup, and choose whether it lands in the Leads Inbox or as a deal in a pipeline.
- Automation-based assignment. With an automation, trigger on “Deal created,” add conditions such as region, product line, or lead source, then set the action to update the deal owner to the correct rep.
- Lead scoring and routing as a native feature is available on Premium and higher plans, which matters if you need round-robin or score-based distribution.
Here is a simple assignment automation you can build in minutes. Trigger on a new deal, add a condition that the deal’s region field equals a given territory, and set the action to assign the owner to that territory’s rep. Duplicate it per territory.
Create Trigger-Action Workflow Automations
Build trigger-action workflows for the repetitive steps your reps do the same way every time. Below are four automations we set up on almost every implementation, written as trigger then action so you can recreate them.
- Create a follow-up activity when a deal changes stage. Trigger on deal stage updated; action creates an activity such as a call or email due the next business day. This enforces the “no deal without a next step” rule.
- Assign new leads to the correct sales rep. Trigger on deal or lead created, condition on source or region, action updates the owner.
- Notify a manager when a proposal reaches a specific stage. Trigger when the deal stage updates to Proposal Sent; the action sends a notification or email to the manager, or posts to a Slack channel if Slack is connected.
- Automate follow-ups across pipeline stages. Combine a stage-change trigger with a wait step and a follow-up email action to keep momentum between stages without manual reminders.
Two things keep automations trustworthy. Build them one at a time and test each on a sample deal before you switch it on for the team.
And remember that importing data does not fire event-triggered automations, except when an import updates or deletes leads, though date-based automations can still run from an import. That detail prevents a migration from accidentally blasting a hundred follow-up emails.
Configure Relevant Pipedrive AI Features
Turn on the AI features that fit your workflow, and treat them as assistants, not autopilot. Pipedrive AI launched in April 2024 and has expanded since, so confirm what your plan includes before relying on any single feature.
The features most relevant during setup are the following.
- Sales Assistant, which reviews your activity, suggests next-best actions, and highlights deals losing momentum. Pipedrive has been rolling out an expanded, voice- and text-enabled version in beta, so availability varies by account.
- AI email writer, which drafts outreach from deal context. This is available on Premium and higher plans. Pipedrive’s own data puts median email composition at well under a minute with it, versus several minutes by hand.
- AI email summarizer, which condenses long threads into a short digest with a sentiment read, useful for reps picking up a dormant conversation.
- AI report generation, which builds an Insights report from a plain-language prompt. It works well only when your stages, fields, and deal naming are consistent, which is exactly why the earlier setup steps matter.
AI output quality depends entirely on clean, consistent data. If your fields and stages are inconsistent across reps, AI reports will produce technically correct answers to the wrong question. Set the foundation first, then layer AI on top.
Integrate Pipedrive With Your Sales and Marketing Tools
Connect the tools your revenue team already uses so Pipedrive becomes the single source of truth for every touch. Pipedrive integrates through its Marketplace, and the sections below cover the categories that matter most during setup. Add only what you will actually use, and confirm each integration and its plan requirements on Pipedrive’s Marketplace before committing.
Connect Web Forms and Lead Capture
Capture inbound leads straight into Pipedrive with Web Forms so you don’t retype any inquiry. Web Forms are part of the LeadBooster add-on, which you can add to any Pipedrive plan. You build a form with Pipedrive’s form builder, embed it on a landing page or site, and route each submission to a pipeline or the Leads Inbox with an owner assigned.
A well-built capture form does three things. It collects the fields you need to qualify (not every field you could ask for), it maps cleanly to your custom fields, and it assigns the new record to the right rep on arrival.
Configure Leads Inbox and Lead Generation Tools
Use the Leads Inbox as a holding area for prospects that aren’t yet active deals, so your pipeline only holds real opportunities. The Leads Inbox is native to Pipedrive, and LeadBooster tools deliver new leads there.
The LeadBooster add-on, priced from about $32.50 per month per company, bundles four tools that surface under the Leads Inbox.
- Chatbot, a 24/7 website bot that qualifies visitors using playbooks and saves them as leads or deals.
- Live Chat, which lets your team take over a conversation in real time.
- Web Forms, covered above.
- Prospector, an outbound tool that searches a large B2B database to find contacts matching your ideal profile.
Web Visitors, which identifies organizations browsing your site, is a separate add-on and is not part of LeadBooster.
Connect Email Marketing and Marketing Automation
Connect an email marketing tool so nurture and sales share the same contact data. Pipedrive is sales-first, so for anything beyond basic sends, most teams pair it with a dedicated marketing tool. Pipedrive also offers its own Campaigns add-on for email marketing built on your CRM data.
Common, currently supported options include:
| Tool | Best for |
| Pipedrive Campaigns (add-on) | Email campaigns built directly on Pipedrive data |
| Mailchimp | Newsletters and list segmentation |
| ActiveCampaign | Deeper nurture automation |
| Outfunnel | Syncing email engagement back to Pipedrive deals |
| Zapier or Make | Custom syncs to tools without a native integration |
Whichever you choose, confirm the sync is two-way where you need engagement data back on the deal, and keep one system as the source of truth for contact records to avoid drift.
Connect SMS and Calling Tools
Add a calling or SMS integration so conversations log automatically against the deal. Pipedrive supports native and Marketplace calling tools, and higher tiers also include a built-in calling feature for click-to-call within a deal.
Widely used options include Aircall and JustCall for full phone systems with call logging and recording. Pick a tool that writes call activity and, ideally, recordings or notes back to the Pipedrive deal, so reps and managers see the full communication history in one place.
Connect Proposals, Contracts, Scheduling, and Payments
Connect quoting, scheduling, and payment tools so a deal can move from proposal to signature to payment without leaving the CRM context. These integrations remove the manual copy-paste that slows late-stage deals.
Common categories and tools include:
- Proposals and contracts. PandaDoc for documents and e-signature, or Pipedrive’s own Smart Docs for templates and signing built on deal data.
- Scheduling. Calendly, or Pipedrive’s built-in Scheduler, so prospects book time that lands on your synced calendar.
- Payments. Stripe for payment links, and accounting connections such as QuickBooks for invoicing.
Map each tool to the stage where you use it. A scheduling link belongs early, a proposal tool at Proposal Sent, and a payment link at close. Tying tools to stages is what makes the integrations feel like one process rather than a pile of apps.
Set Up CRM Lead and Conversion Tracking
Add source and conversion tracking so you can prove which channels produce revenue, not just leads. Capture the lead source on every new record, either through your web form, your capture tool, or an automation that stamps the source based on how the lead arrived.
For marketing attribution, tools like Outfunnel or an analytics integration can pass campaign and channel data onto the deal, so your Insights reports can break win rate and pipeline value down by source. The setup principle is simple. If you want to report on a source later, you have to capture it at creation, consistently, in a single-option field.
Set Up Reports, Dashboards, and Team Adoption
Build your core reports and a rollout plan together, because a CRM delivers value only when the team uses it and trusts the numbers. Pipedrive’s reporting lives in Insights, and adoption depends on clean data habits you set from day one.
Build Pipedrive Insights and Sales Reports
Create your reports in Insights, then group them into dashboards for each audience. Open Insights from the left menu, click “+” and choose Report to build one, or Dashboard to create a board. You can also build a report from a plain-language prompt using AI report generation, or drag existing reports onto a dashboard.
A few plan details shape what you can build. Multiple dashboards are available on Premium and higher plans; you can hold up to 25 reports per dashboard; the deal revenue forecast report needs Premium or higher; and the product revenue forecast report needs Growth or higher. Insights also respects visibility, so a rep with owner-only visibility sees only their own data in reports.
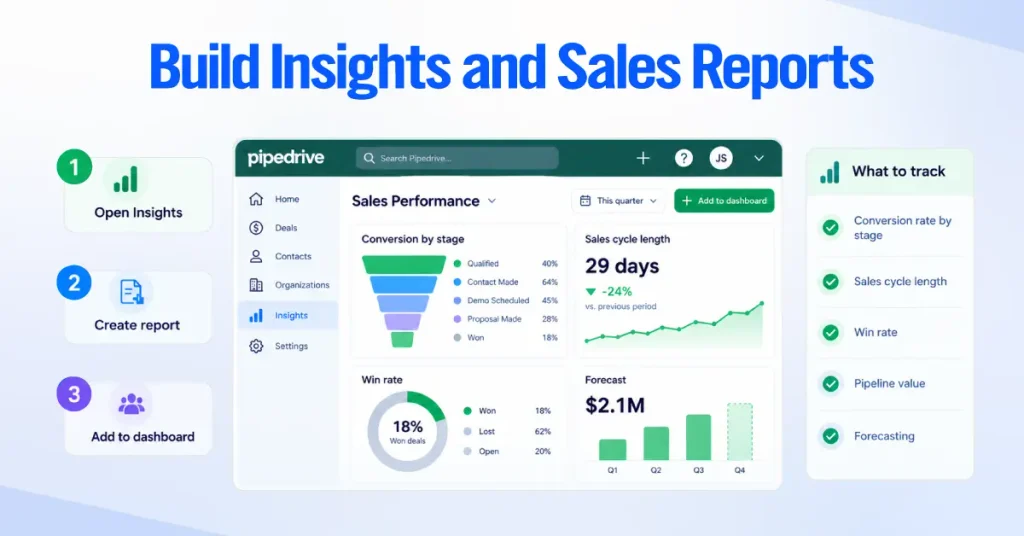
Build reports around the metrics that actually drive decisions.
- Conversion rate by stage, to find where deals stall.
- Sales cycle length, to see how long deals really take.
- Win rate, overall and by rep, source, or product.
- Lost reasons, which is why the required lost-reason field earlier pays off.
- Pipeline value, ideally weighted by stage probability.
- Sales activities, to confirm the inputs are happening, not just the outcomes.
- Forecasting, using the revenue forecast report to project expected close.
Set goals on the reports that matter using the Goals feature, and add key reports to a shared dashboard so managers and reps look at the same numbers in the same place.
Train Your Sales Team and Maintain CRM Data Quality
Roll out the CRM with short, role-specific training and a few enforced data rules, because adoption is won or lost in the first two weeks. Reps adopt a CRM that makes their day easier and abandon one that feels like reporting homework.
A rollout that sticks usually includes the following.
- A 30- to 45-minute live walkthrough of the daily workflow, not every feature. Focus on adding a deal, moving stages, logging activity, and using synced email.
- A one-page reference with your stage definitions and exit criteria, so everyone moves deals for the same reason.
- A named owner for the CRM who answers questions and fixes issues in the first month.
- Enforced required fields for the data you report on, so quality is built in rather than nagged for.
- A weekly pipeline review using the dashboard you built, which quietly reinforces that the data is used and therefore worth keeping accurate.
For ongoing data quality, use deal rotting to surface neglect, merge duplicates as they appear, and review permission sets and visibility when people change roles. Clean data is not a one-time migration task. It is a habit the setup should make easy to keep.
Pipedrive Setup Best Practices
The best practices below are the setup decisions that most affect performance, reporting, automation, and adoption. Each one addresses a mistake we see repeatedly when we audit accounts that “aren’t working.”
- Match stages to buyer commitment, not rep tasks. Task-named stages create pipelines full of to-do lists instead of opportunities, and they break conversion reporting.
- Keep it to five to seven stages. More stages feel rigorous but slow reporting and give deals more places to hide.
- Write and enforce exit criteria. One clear rule per stage, backed by required fields, keeps every rep’s pipeline comparable and your forecast honest.
- Capture only fields you will use. Every unused custom field creates friction for reps and adds stale data. If it will not appear in a filter, report, or automation, do not collect it.
- Set up email and calendar sync early. Most manual data entry disappears once communication logs itself. Skipping this is why so many pipelines look empty.
- Automate follow-up and assignment first. These remove the most admin with the least risk. Do not automate anything that hides work reps need to see.
- Test every automation before switching it on. Run it against a sample deal. An untested automation at scale is how teams lose trust in the CRM.
- Import in the right order with clean data. Organizations and people first, then deals, with duplicates merged. A rushed import creates months of cleanup.
- Start with tight visibility. Widen access deliberately. Over-assigning Admin exposes data across the whole account.
- Standardize deal names before import. A consistent title pattern keeps the pipeline readable and reports groupable.
The single highest-leverage habit is enforcing exit criteria with required fields. It quietly fixes forecasting, reporting, and AI accuracy at the same time, because every downstream feature depends on consistent stage data.
How Long Does Pipedrive Implementation Take?
There is no single answer, because implementation time scales with data quality, team size, and how much automation and integration you need. A bare account can be live in a few hours, while a full team rollout with migration and integrations runs across days to a few weeks. Below is how the scope changes the timeline.
- Basic setup. Creating the account, setting company defaults, and building one pipeline takes a few hours. This gets a solo user or a very small team up and running quickly.
- Small business implementation. Adding users, permissions, custom fields, products, and email and calendar sync typically spreads across a few days, largely because you are making decisions with the team rather than clicking through screens.
- Data migration. The variable that most affects timing. A clean, well-structured spreadsheet imports in an afternoon. A messy export from an old CRM, full of duplicates and inconsistent formats, can take days of cleanup before the import itself.
- Custom automation and integrations. Each automation and each connected tool adds build and testing time. A handful of core automations plus email, calendar, and a calling tool is a few more days, done properly with testing.
- More complex implementation. Multiple pipelines, custom visibility groups, lead routing, advanced reporting, and several integrations across a larger team is the kind of project that runs over one to several weeks, especially when it involves change management and training.
Our honest guidance is that the software is fast to configure; the time goes into decisions, data cleanup, and adoption. Rushing those three is exactly what produces the messy accounts people ask us to fix later.